Most of my fellow tubie mamas will know that with a feeding tube, reflux and/or nausea often come with it. GRRRR!!!!! Feeding an all natural, whole foods diet has done wonders for Bradley, but we still do battle nausea and reflux on a regular basis. Of course, it is far, far less intense than the debilitating nausea he experienced on formula.
Bradley had consistently been on 1 or 2 reflux medications since shortly after his birth. He’s been on every reflux medication that is safe for him to take. While they did help, they did not have near the effect I’d hoped for. So, I searched for anything else I could give him that might help where the medications lacked. It was not even on my mind to find a medication replacement. I didn’t believe that would even be possible. Much to my surprise, I found a regimen that has been so incredibly effective, the need for his 2 reflux medications was eliminated completely. It not only worked as well as medications, it worked even better. Astonishingly so.
All I can say is that this has worked very well for my son. I cannot promise it will have as tremendous of an effect for you or your child, but I do strongly encourage anyone to give this a try to see if you have similar results, given how much of a difference this has made for my son.
Aloe Vera Juice
Aloe vera juice has made the most significant difference. While Bradley was always fine a few minutes after a meal once he began a diet of whole foods, he did bring up a little of his food almost every single meal. He would quickly recover, and we would move on. He did not lose enough food through these little spit ups to concern me about his intake, but I did have concerns regarding his comfort level. No one wants to vomit a little bit almost every time they eat. Homemade aloe vera juice solved that for him. It is very rare that he brings up any food at all. I have taken him on and off the aloe vera juice multiple times to test if it really was the aloe vera juice because I was in disbelief that it could have such an impact. It is definitely the aloe vera juice.
I have read quite a bit about aloe vera for reflux and have learned primarily that while it has helped many people with reflux, no one has any idea why or how. I have also learned that the green and yellow parts of the plant are a GI irritant, which has lead to warnings regarding its use in children because it can cause diarrhea. Many commercial varieties of aloe vera juice are made by companies that do not take great care in removing these parts of the plants before making the juice. With that in mind, I chose to make Bradley’s aloe vera juice myself as I trust myself to remove those components thoroughly more than I trust a company to. Use your discretion.
To make aloe vera juice, you need aloe vera leaves.
These leaves must come from mature plants, which means they will be at least 12 inches long. You cannot purchase a small, baby aloe vera plant and use its leaves for this purpose. I find aloe vera leaves at a local produce market. I have also seen them at Whole Foods. While I have not tried this myself, I have heard of  people ordering them online. I like to buy several at a time, prepare the gel, and then freeze it so I only have to complete this process occasionally.
Chop the leaves into sections. Stand the sections on end, one at a time, and cut off the spikey sides. Your hands will thank you. Once  the sides are removed, lay each section flat and remove the rest of the green part of the plant until all you have left is the gel. Wash this gel under running water thoroughly. You do not want any yellow liquid remaining on the gel. The gel will be very gooey. That is ok.
Once you have rinsed all the gel, set aside a few pieces to make a fresh batch of aloe vera juice. Line a baking sheet with parchment paper and place the remaining pieces of gel onto it and freeze for a few hours or overnight. Be sure they are not touching each other until they are frozen  so they do not stick together. Once frozen, place the pieces into a sealed container and store them in the freezer until you are ready to make more.
To make the juice, add just enough water to the blender to touch the bottom of the blades. Add a few pieces of gel 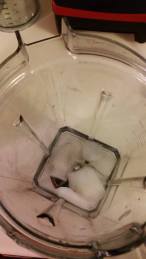 and blend, blend, blend. Pour into a jar or container and store in the refrigerator for up to 3 days.
I give Bradley 1 ounce of this juice every morning and night. I am not offering this as a dosage for your child. It is the dosage that has worked well for my son. I would start with less and slowly increase to see how your child does to find a dose that works well for your child without any side effects. Bradley has never had side effects from the aloe vera, but as with anything, always start low and watch for potential reactions or problems.
Ginger Tea
 The second part of what has helped my son is ginger tea. Bradley’s reflux is at its worse in the morning, which is common for those with reflux. He does not get fed until 10 or 11 am because of this. One piece of advice regarding reflux and nausea is to determine whether it is worse at a certain time of day and schedule meals around that time.
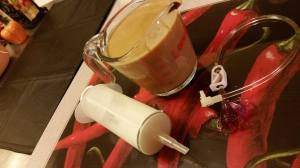
In the morning, shortly after waking, Bradley slowly receives 4 ounces of warm ginger tea. Ginger helps alleviate nausea and the warm water helps “wake up” the gut from a night of rest without requiring it to do much work. This helps set the tone for the rest of the day.
 Fresh is usually better than not fresh, so I make Bradley’s tea using fresh ginger root rather than dried ginger tea bags. I make his tea by making a frozen ginger tea concentrate, which I thaw and dilute.
Chop 30 grams of fresh ginger root into small pieces. Heat 2 cups of water to boiling and soak the ginger pieces in the water for 30 minutes. Dump the water and ginger pieces into the blender and blend for 1 minute. Pour this mixture through a sieve, collecting the tea into a jar or container.
 If you want a stronger tea, divide the concentrate into 4 containers. For a more mild tea, divide it into 5 containers. Freeze these portions until you are ready to use them. When ready for use, thaw a portion in the refrigerator over night. Pour it into a quart sized jar and add enough water to fill the jar. Store in the refrigerator. I have stored this tea in the refrigerator for up to a week without any issues.
This regimen has helped Bradley tremendously, and I hope others experience similar success!
If you have found my blog helpful, please consider making a small donation here to cover the expenses associated with keeping this blog available for everyone.


 In a dutch oven, stir together the olive oil, onions, celery, red pepper, and garlic and saute over medium heat for 10 minutes, stirring occasionally. Stir in the sausage and cook for another 5 minutes.
 lightly simmer uncovered for 2-3 hours, stirring occasionally. Remove the ham bones. Pull any remaining meat from the bones, and add back to the pot.